Showing posts with label Flooring. Show all posts

10.07.2011

Kitchen Summarized & Last Roomspiration Link Party

Today I'm going to attempt to summarize our kitchen remodel into one post (which is hard since I blogged about it for an entire month back in August!).

For those of you who read all those posts, bear with me. For those of you who haven't, be sure to click on the links I'm supplying throughout the post for more details on the various aspects. I'm also linking up this post to the Roomspiration Blog Hop Kitchen Edition on the DIY Showoff today. If you're stopping by from over there, be sure to check out the 31 Days to a Clutter Free Home series while you're here!


Of all the rooms we've remodeled in our little 3 bed/2 bath ranch, the Kitchen was the most ....well... the most everything. It was the most expensive, the most extensive, the most time intensive...but it is by far and away the best transformation. Everyone who walks into our home just says "wow" when they see the kitchen. And for good reason. You really don't expect to see a kitchen this nice in this small ranch house in the middle of an Indiana cornfield. And then you find out that we DIY-ed our way through the whole thing and it's even more amazing.

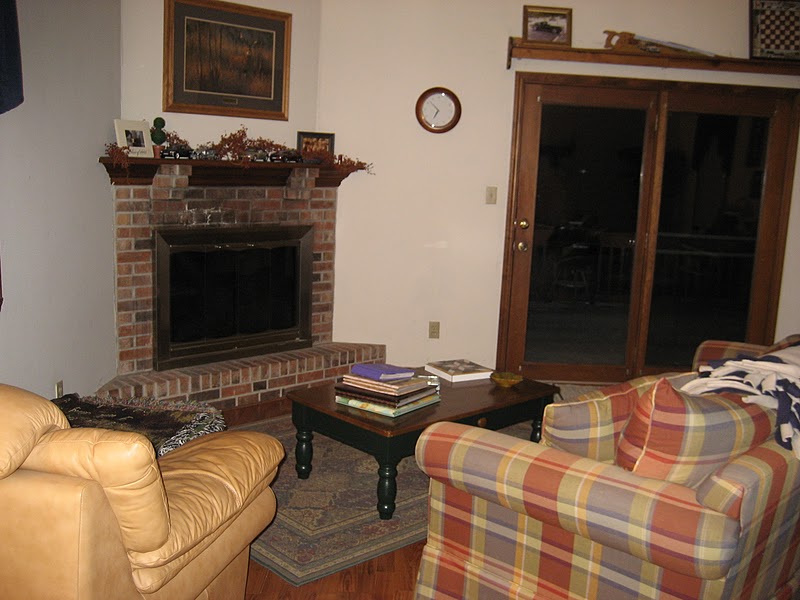
So, let's get down to it!  Here are the before photos - Dark. Dirty. Disfunctional. Disgusting. Diagonal-faux-wood-grain.


And here are the after photos:


And here's how we did it...

First of all, we decided to bust out the wall between the kitchen and front room to open up the living areas in our home and also bring more natural light into the kitchen. This also created a great spot for a breakfast bar.


Then we spent a great deal of time determining a new kitchen floorplan


What really helped in this process was when I spent time imagining where I would store every single item we owned in the new kitchen (small appliances, dishes, food, etc.). I literally measured the size of the crockpot, the iced tea maker, etc. so I would be sure to have a cabinet that would hold these things. This helped me to realize that we definitely needed to add a tall pantry cabinet on one side of the room. 

Once we had a layout, we looked into buying cabinets from Lowe's but were disappointed in the quality for the price we would have to pay so we decided to build our own cabinets with the help of Dave's older brother, Patrick. Talk about a DIY project, huh???


You can read more about that process in great detail here and here. We basically just studied a lot of cabinet displays that we liked at Lowe's to decide what we were going for, how we were going to build it, etc. Then we bought some tools and rough cut cherry and got to work. Nearly 2 years of long weekends and vacation days later, we were done. :)


Here are the boxes built and delivered to our house from Patrick's shop a state away. At that point, they still needed to be installed (obviously), stained, polyurethaned, and the doors still needed to be built and installed. 


They ended up sitting right in that spot for about 3 months while we gutted the kitchen, re-drywalled (let's just say wallpaper borders are NOT my friend), and updated electrical (we added 5 can lights and replaced an old ceiling fan with a flush mount light), etc.

The week before Christmas, our two brother-in-laws, Rod & Linn, came to the rescue and helped Dave finish the drywall and install these bad boys. Here's what the kitchen looked like when they arrived.


Here they are working on it...


And here's what it looked like when they left. What a tremendous blessing those guys were to my sanity!


Shortly after that, Dave got to work on the moldings. Our friend, Mark, helped Dave run the crown model in his woodshop.  We ended up painting the dentil molding portion (the blocks) black. It looks very nice with the cherry cabinets.


And here's the first cabinet with it installed.


And the second. This step made a HUGE difference.


Here you can see all the cabinets stained, with the crown mold (minus the black painted dentil mold).


We purchased all new Frigidaire Gallery stainless steel appliances. I am incredibly pleased with that purchase. They have a nice protective coating that does not fingerprint like other stainless steel appliance suites I've seen before.


After a few more months, Patrick was finished building all the cabinet doors. He brought them to us and we stained and polyurethaned them. Here they are hanging in the Great Room drying.


In the photo below, the cabinets had all been polyurethaned (thanks to my sister-in-law Michelle helping me one long weekend!), the black dentil mold had been added, and all the doors were installed (minus one that was the wrong size and had to be re-built).


And here you can see the bottom molding that we later added.  It helps conceal the under cabinet lights and adds another level of luxury. 


As if DIY-ing the cabinets wasn't enough, we also decided to build our own countertops. (We apparently have a thing against going the easy route.) We considered many materials but loved the look of granite, so we ended up using granite floor tiles to achieve the same look for a fraction of the cost.


We chose 16" square travertine tiles for the floors. The best feature of these floors is that they are the exact color of dirt so they don't have to be cleaned too often!


We call this part the "waterfall" where the tiles just fall right into the sunken Great Room. Levi loves playing there.


For the tile backsplash, we chose a glass accent tile to be placed between the granite tile countertops and the 2" travertine tile (that matches the travertine floor).


Dave even cut rounded tiles around the bottom molding on the cabinets under the microwave. Do you see it? He's so detail oriented. Gotta love it!


In the end, with all our DIY steps along the way, our kitchen remodel only cost $6,950. Overall, I think it was an incredible deal even though it was an incredible amount of work. See my little financial comparison post where I tried to estimate what it could have cost us if we'd hired someone to do the same thing and bought custom cherry cabinets and granite slab countertops.

And just in case you don't remember, this is what the kitchen used to look like. 


It sure has come a long way, hasn't it?

9.28.2011

Our Baby's Nursery

We had our little man, Levi, last July. Just like any first time mama, I put tons and tons of thought into creating a cozy little space for our newborn. I wanted it to be absolutely perfect for him. We did not know until he was born that he was a boy, so we went with a neutral green and brown color scheme. We painted the walls a neutral color - Shoreline Haze by Valspar and laid down new beige carpeting.

We were blessed to receive a gently used crib and glider from our friends, the Smiths. It just so happened that the glider and ottoman were upholstered in a light green fabric that matched the curtain panels I had for the space perfectly.

My parents got us the crib bedding from Babies R Us, Kids Line Bunny Meadows. I also have other crib sheets that I swap out as needed that are plain green, yellow or polka dotted.


I looked into changing tables and dressers and decided that I just wanted to purchase a dresser and put a changing mat on top of it that way the dresser could be used when the he grew up in a big boy room and it would also eliminate the amount of furniture in the space. I scoured Craigslist for a few months and finally found a great 6 drawer dresser for only $20! Sure beats an $800 Pottery Barn one...haha! So I brought it home and refinished it out in our carport in the heat of the summer when I was 8 months pregnant. Click over here for the detailed story on how I turned this dresser:


Into this:


We keep cloth diapers and disposable diapers in the top two drawers of the dresser and Levi's clothes in the bottom 4 drawers. We repurposed a stainless steel trash can for a diaper pail. We have a waterproof drawstring cloth diaper bag on one side of the can and a regular trash bag on the other side for disposables. Smell is not an issue since the trash can seals up well.

I also "shopped our house" and decided to use our Pier One bookshelf (that was a wedding gift from years before) for toy storage. And I gathered up plastic drawer containers that we already had for extra bedding, diapers, wipes, toiletries and other miscellany. I have found that the drawers really help organize the small baby belongings well. I orginally had a lot of this stuff stacked in boxes but then I would have to take out an entire piles of boxes to get to something on the bottom and that was very inconvenient.


I printed labels for the drawers for easy identification. This really helps Daddy and anyone else watching Levi to find things. And it helps me remember where things belong as well.


I really like having all of Levi's toys on the bookshelf inside the closet. This way we can easily close the door on the toys and have a clutter-free looking bedroom. This is especially nice right now while our house is on the market.


If we ever have another baby I may re-upholster the glider and ottoman. It has now been through 2 baby boys, one of which I know for a face was a big spitter. I found this tutorial and I am sure I could do it (maybe with a little help from my sister-in-law...hope that's ok with you Margy...LOL) Re-upholstering the glider/ottoman would open up a whole new world of fabric options! Wow! Just check out these 2 custom designs here.


As with everything else, Levi's nursery is a work in progress. As he grows and changes, his needs do as well and as a result, the room has been re-arranged and re-organized at least a handful of times over the past 14 months. For example, when he was first born, we went through 1 bib and burp cloth per hour. So we had an entire dresser drawer dedicated to these items. Nowadays, he doesn't really need those but his pants and shirts take up a lot more space, etc. So, my original plan was to somehow label the drawers so others could find things but now 1 year later I realize that would have been an exercise in futility since the drawer contents are always changing.

We still do not have any artwork up on the walls and now that we're attempting to sell our house, we figure we might as well not bother. Fewer nail holes for the future owners to patch, right? But my original idea was to hang a mirror over the dresser/changing table. I also have Levi's birth certificate framed and would like to hang that.

Also, the week Levi was born, my sister and I did a little DIY art while he was napping. My inspiration was this photo I found on Curbly.


We took 2 - 12" x 12" x 1" pieces of styrofoam, cut them down to 10" squares with a bread knife and then covered them with scrapbook paper (cutting 1" squares out of the corners and wrapping the paper over the sides). We glued it to the styrofoam and used thumbtacks to hold the sides in place while it dried. It worked well.  It was my idea to create a gallery wall with possibly the mirror, the DIY art, and photos of my sweet little newborn baby, but...yeah...life happened...and the gallery wall, well, didn't.

Still, all regrets aside, at least I can rest easy knowing it does not look like this anymore...Behold: the before picture...complete with dark wood/ white painted trim - a two tone effect, dark green disgustingly dirty carpet, and Victoria's Secret box pink striped walls.


So, thanks for stopping by and checking out our nursery. Hope you enjoyed it. I am linking this up to the Roomspiration Blog Hop today on a la mode. Check out tons of other cute nurseries over there.

9.19.2011

Great Room - Before & After

We are blessed to have a large 18 ft x 20 ft Great Room that was built on to the back of our home {somewhere in the early 90s I'm guessing}. Check out the floor plan for more info:


It really is by far the most spacious room in our home with vaulted ceilings and 3 large windows and a large sliding glass door overlooking our wooded 1 acre lot. There's even a working wood-burning fireplace in one corner. This was always our favorite room in the house, so when doing our whole house makeover over the past few years, we were determined to accentuate the positives of this room.

Here are some icky, yucky before photos. At that point in time, we used our front room as a TV room and had a dining area, piano and sitting area set up in this room. There was a lot going on.


We had purchased the couch and overstuffed leather chair and ottoman when we got married but practically everything else in the room was free/gifted from friends/ family members. Looking back, I cringe because I do not like all the patterns we had going on along with the dark wood trim. And the clutter and trinkets. That's the part I really don't like.

We went on a Bungalow tour of homes in Broad Ripple (a part of Indy) once and that day forever changed my perspective in decorating. I remember going into the homes and being amazed at how there was nothing sitting out. Now, that could be because they had 100's of strangers wandering thru their homes those days and they took their personal effects out, but....Dave & I were both struck with how much we loved the simplicity and peaceful feeling that no visual clutter evoked. So we set out on a 5 year journey of purging and decluttering in an effort to achieve that sparce look.

Nowadays we have our home staged to try to sell it so that explains why we pretty much have NOTHING out, but honestly, I love it. There's so much less for our 1 year old to get into, there's less to dust around, etc. I have just found that I'm a lot more apt to dust the top of a piece of furniture if I don't have to first unload 15 things from it!

So, getting back to the Great Room.... The walls were painted off-white with a flat paint by previous owners so over the years with normal wear and tear, they were beginning to look rather dingy and there were some nails and seams popping out of the drywall that needed to be repaired. We knew we wanted to choose a warmer color for the walls that would make the room feel cozier. We chose Valspar "Arid Plains" for the walls, from Lowe's. We painted the ceiling white and the trim and mantle a high gloss white.

The old flooring was cherry laminate. It had several areas that had gotten wet and bubbled over the years so it needed to be replaced. We opted for a speckled frieze carpet. The speckles make dirt seem less obvious and the soft carpet and pad are great for our little boy to play. Not to mention it is very comfy underfoot.


After 3 years of this room looking like this (it acted as a storage space as we worked on all the other rooms), it is so nice to have this space back!


This room formerly had 1 ceiling fan in the middle of the room and it was always too dark and sometimes a little stuffy since it was added onto the house so we added in a second ceiling fan and now the room stays nice and cool on hot summer days and is very well lit. We also ended up replacing the 3 windows and the patio door for more energy efficient models. That also drastically improved the heating/cooling in this added on room.

We purchased brushed nickel curtain rods from Lowe's and white IKEA Ritva curtain panels for a nice floor-to-ceiling look.

David purchased the N.A. Noel painting, "December" over the fireplace off ebay from someone all the way in Canada and reframed it with ancient oak barn siding from his parent's corn crib in Ohio that was damaged in a wind storm. The irony of that is the artist's gallery is located just 10 miles from our home! I think the frame adds so much to the painting. I just love it! There's chipped white and red paint on the wood that brings out the colors in the painting.


I purchased the woven storage ottoman shown below from Garden Ridge for just $25. It is extremely nice to have for Levi's toys and it forces us to edit his "collection" so that we don't end up with way more toys than we need in our living area. And even though he's only 13 months old he already knows how to clean up and put his toys away. He did it this afternoon without me even asking him to!


We reused our plaid sofa although I'd replace it with an IKEA Ektorp slipcovered sofa in a heartbeat if money were not an issue. We also reused our leather chair and ottoman. And we scored the dark brown leather loveseat from my parents' garage. Mom purchased it a few years ago then decided she needed a wider sofa rather than a loveseat.

The armoire in the corner, shown below, houses our home office. More can be found on that here. The straight back chair next to it was inherited from David's Aunt who got it from David's Granny.


I also hope to someday refinish the coffee table and matching end tables (that are currently in our guest room). They have dark wood tops and hunter green legs. You know their type. You probably saw them in many a home back in the early 90s. But I will wait for now until I decide more what color I want to go with and if I have a new couch or something.


And here's my attempt at doing what "The Nester" recommended on InCourage one day. Her idea is GENIUS! I placed this drop leaf table in the room with basically nothing on it. And I love it. It is very handy if I need a place to sit down and write a note or do the bills, or even I would ever have a chance to scrapbook or work a puzzle (ha! with a 1 year old I don't see that happening...). Once again, like with dusting, if I have to take the time to clear off a space to use it to work/play, it just won't happen! I don't want knick-knacks to get in the way of living around here.

It is SO nice to have a table other than the one we eat our meals at so we don't have to pick up what we're working on just to eat dinner.


Here's a rough breakdown (estimated from memory) on what we spent on this room transformation:

Drywall repair - we hired a professional to speed up the process due to the large size of this room and the vaulted ceilings - $1,500

Paint (for walls, ceiling, trim, primer also) - $165

Carpet - $820 (I definitely recommend shopping around - this was my 3rd stop, a local store, after estimates of $1600 and $1200 - and they installed it 3 days later as opposed to Lowe's schedule of 3 weeks out!)

New windows and door - $700 materials + $320 labor = $1020

Storage ottoman - $25

Computer Armoire - $100

And that's pretty much it since the rest of our furniture we already owned!

TOTAL - $3,630

Holy cow. Once again I'm pretty amazed at how much that cost us! But I still feel we were being pretty frugal. I need to figure out how other people do things cheaper! Cuz I already have so many other things that I'd love to do such as get a new sofa, a storage ottoman as big as our coffee table, new arm chairs, a rug, etc, etc, etc. Hhhhhhh....patience....But for fun, I did create a mood board here that helps me keep up hope that someday I can do a bit of a makeover.

I'm linking this up to the Roomspiration blog hop and link party at View Along the Way. Check it out for lots more living room inspiration.


Related Posts Plugin for WordPress, Blogger...