Showing posts with label Financial. Show all posts

10.08.2011

Day 8 - An Organized Fridge

Welcome to Day 8 of the 31 Days to a Clutter Free Home series. Today we're talking more about de-cluttering the kitchen, particularly the fridge/ freezer.

I love reading other peoples' blogs and back in August, I especially enjoyed Jen's post on IHeart Organizing where she fully disclosed the contents of all her kitchen cabinets and refrigerator and freezer. It was a classic, let me tell ya.

Anyways, I particularly noticed how she used labeled acrylic containers inside her fridge/freezer to categorize items. If there's one thing that I've learned in the last few years it is that containers can go a LONG way in making a space seem less cluttered. So why not use them in the fridge too?


And Jen's post also reminded me of this photo I had also found on Pinterest awhile back. I especially love the handles on the baskets shown below. How handy would that be? (I've since found these for sale at Wal-mart.)


So, I thought I'd try to apply this tip to our fridge. It wasn't really that bad off to begin with... It didn't look like this or anything...


But it does seem like our new side-by-side fridge is a lot more prone to disorganization that the old top mount freezer setup we used to have before our remodel. So I set out to re-organize our fridge using some baskets.

I already had the basket below and decided to use it for leftovers. This is typically what Dave takes to work for lunch so it's nice to have all the choices right there in one basket. We can pull it out in the mornings and decide what he's going to eat that day.


I also purchased this white bin from Target for around $4. It is perfect for all our dairy items (sour cream, cream cheese, cottage cheese, yogurt, pudding, etc.).


I also purchased another smaller white bin like the one above to corral all the jams and jellies. And here's what our fridge looks like now.  I wish I had a label maker for my baskets but for now it works the way it is. I love using baskets to organize things. Even if I just toss items in the baskets and the inside of the baskets are a bit chaotic, it helps that the mess is at least contained in one place. I feel it looks a lot less cluttered now!


We keep drinks on the top shelf, dairy on the second shelf down, leftovers and pickles on the third shelf, jams, jellies, applesauce on the fourth shelf, and bread baking supplies behind those items (since they're used more infrequently), cheese and meat in the top drawer, vegetables in the next, and fruit in the bottom drawer. Then we have the milk and butter in their respective compartments on the door, along with condiments.

I also spruced up the freezer side a bit. It happens to have some pull out drawers that help to corral frozen vegetables and meat.


While browsing Pinterest I also found this particularly inspirational photo.


I love how this person made an inventory on the front of their upright freezer using a dry erase marker! I have tried to keep an inventory on a piece of paper on top of my chest freezer but it inevitably gets missplaced. I thought this was a fabulous idea! No more losing the paper. And you can edit it easily just by wiping off and rewriting without having to scratch things off and rewrite like with pen and paper, etc. So it would continue looking neat even as you use things up.

I also recommend cleaning out your fridge each week on trash day. Get rid of all yucky fruits and vegetables and other expired items. On days when the fridge is closer to empty, take the opportunity to wipe it down before heading out to the grocery so the shelves are clean when you get back with fresh stuff. This helps keep it clean all the time so you don't have to dedicate one big day to fridge cleaning.

Also, in our household we tend to fill up our freezer in the fall / winter after deer hunting season and pork butchering season and then it gets nearly empty by early fall. My goal is to completely empty it by October each year so that I can defrost it without any hassle.

So, what do you think? Will any of these tips help you to have a more clutter free kitchen?

10.04.2011

Day 4 - Financial Clutter

Today I'm going to talk finances. How on earth does this relate to a Clutter Free Home, you ask? Well, I will cut to the chase and explain.

My husband and I spent the first 5 years of our marriage trying desperately to attain all that our parents had in 25-35 years of marriage. We borrowed to buy a house, cars, an education, clothes, groceries, dinners out, expensive vacations....you know the drill. As a result, we racked up $38,000 of debt outside of our home mortgage ($14,000 on credit cards that we then refinanced into a second mortgage on our home, $8,000 to family members and $16,000 in student loans). We had not yet learned that just because a bank would loan you money to buy something doesn't mean you can "afford" it. Needless to say in 2007 we finally had a reality check when we heard of Dave Ramsey from our friends Jared & Kim. And through 7 months of complete torture working 5 jobs between the two of us, we paid off every last penny of debt outside our first mortgage. Here I am that fall cutting up my "first credit card" that I had opened my sophomore year at Purdue. Hallelujah and GOODBYE!


And here I am stuffing Sunday papers at 2 a.m. one night. This is what I did every night from 1 a.m. to 5 a.m. for 7 months instead of sleeping...


So, getting back to the clutter free topic....Not long after the debt was paid off, we realized a side benefit of being debt free was not receiving as much paperwork in the mail each month. Take away 7 monthly credit card statements and that's a lot less paper clutter! Not only does it save a tree but it really reduces clutter in our home and confusion when sitting down to pay the bills. I remember there was a point where we got a bill in our mailbox nearly every single day of the month (not to mention calls when we were late paying them!). It was overwhelming. Nowadays I smile each time I go to the mailbox and just have junk ads because at least it is not a credit card bill charging 28% interest!

Come on, take the plunge and get debt free. It will definitely de-clutter your life!

*If you're really interested in getting out of debt, definitely check out daveramsey.com as well as a fellow 31 Days of Change blogger, Brooke's site: Spruce Your Nest this month. Brooke is writing about Financial Freedom this month and I found her blog the other night as I looked thru the list of 600+ bloggers that linked up over the weekend. Good tips and she's a fellow fan of Dave Ramsey. I love it.

9.21.2011

Weekly Menu Planning Post

So the reason I have issues with things like menu planning is I have a tendency to beat myself (or Dave) up if we don't stick EXACTLY TO THE PLAN. So then I give up on the concept entirely.

Last week I blogged about our meal plan for the week here. This is what we had planned along with the edits showing what actually happened:


MONDAY - angel hair pasta & sausage meatballs

TUESDAY - Jammin' Deer Stew

WEDNESDAY - Authentic chix enchiladas recipe and apple pie

THURSDAY - Dave's late night, so we're on our own...I generally pack him something and snack on stuff around here- Dave got off work early so we celebrated and went to Red Habanero, our fav Mexican restaurant!

FRIDAY - stromboli We were both tired and didn't feel like rushing around before going to church at 6:30 so we had apple cider bread and quickie pizzas (bagels with spaghetti sauce, pepperoni and mozzarella cheese and italian seasoning warmed in the toaster oven!)

SATURDAY - eating at the Wknd in the Word dinner at church

SUNDAY - Coffee Rubbed Deer Tenderloin, mashed potatoes and green beans I didn't feel well and we had a showing scheduled for our house so I didn't want to make this big meal so I talked Dave into making pancakes with local maple syrup and bacon for lunch after church. Yum! And then we made venison chili with a mexican flare and served it with shredded cheddar cheese and Fritos for dinner.

So, 3 out of 6 meals that I had planned were changed up. Usually that would throw me into a depression / rebellion against meal planning, but I guess I'll just try it again this week...because this printable from The Project Girl really does help me save on groceries. 

Here's our plan for this week. I based this menu off what we already had on hand to try to reduce the amount of stuff we'd need to buy.

MONDAY - deer tacos with rice and beans
TUESDAY - Ham & Bean Soup
WEDNESDAY - Stromboli (hoping to have some friends over again)
THURSDAY - Dave works late - baked beans & bacon for his packed dinner, I'll eat a Schwan's LiveSmart entree or something.
FRIDAY - Italian Sausages with onions and peppers and baked beans
SATURDAY - Rice & beans with chicken
SUNDAY - Sausage Lasagna

All I had to buy this week was refried beans and taco rice for Monday night, lasagna noodles and cottage cheese for Sunday, peppers and onions, lettuce, and other staples like fruit, milk, butter and paper products.

9.20.2011

Budget Guest Bedroom Makeover

A few months back, this is what our guest room/ office looked like. Not so inviting, eh? So I decided to do a ton of purging and relocate the office to an armoire in the Great Room. And that left us with a completely empty guest bedroom.


Before we had our baby, we had possessed a full size bed but had since given that back to Dave's parents, it's rightful owners. So we pretty much had nowhere for guests to sleep. When we did have guests, we gave them our bed and slept on the floor on 4" thick foam sleeping mats meant for tent camping. So something had to be done. Because I spent way too many nights as a pregnant woman sleeping on the floor!! Ah!

However, I didn't really like the idea of having a whole bed set up in this room all the time because it's small anyways (about 9 x 12) and I like to be able to use it for other things if need be. So after reading this post from Young House Love, I thought, "why don't I get a sleep sofa?" It can be tucked away except when we have visitors.

But since we'd just spent a fortune on just about every other aspect of our house, I knew that I couldn't really spend a lot on this room. And a lot of sleeper sofas sell for $800-$1500. So I began scouring Craigslist.

Finally on one fateful day, I landed upon a sleeper loveseat. It did not include a mattress but I figured I could make it work. After all, it was cheap! We borrowed our friend's truck and had everything set up to go get it then Dave had to stay late at a deacon meeting and it all fell through. I was SO UPSET! 4 days later, we had another open evening so I called to see if it was still for sale and lo and behold, it was! So we borrowed the truck again and drove 45 mins to go pick this up on the other side of town. She was asking $75 but I asked if she'd take $60 and she did.

Once we got it home, I found replacement sleeper sofa mattresses for sale for about $150 online but we were able to tuck our camping sleeping mats inside and they work for now. Then we put another 2" thick foam mattress pad (that we already had) on top of that and it is VERY comfortable. Sure can't feel any bars under your back with 6" of cushion underneath.

So, this is our current guest bedroom. Since we had plenty of extra furniture for our Great Room, I decided to move these end tables into the guest room. Along with a tiffany lamp that Dave gave me years ago when we were dating.
The curtains were leftovers that my mom purchased and did not like but didn't return in time, so I picked them up from her house. I also knew I wanted to buy a few throw pillows but some of them can get expensive.

So one day I was shopping at Garden Ridge and discovered that most of their pillows are only $9.99. So for under $20 I brought home these 2 gorgeous pillows that help to tie together the wall color, green curtains and brown loveseat.

Therefore, the grand total spent on this transformation from disaster of an office to cozy guest bedroom was just $80. Sweet, huh?


This is all that is in this room for now but I like it that way. We use the closet to store DIY supplies and then it leaves the room open for us to do projects in there or for guests to lay out their suitcases when visiting. It's come a long way, hasn't it?


I'm going to link up to the Roomspiration Blog Hop over at DIY by Design today. Check it out for tons of Guest Bedroom ideas!


9.19.2011

Great Room - Before & After

We are blessed to have a large 18 ft x 20 ft Great Room that was built on to the back of our home {somewhere in the early 90s I'm guessing}. Check out the floor plan for more info:


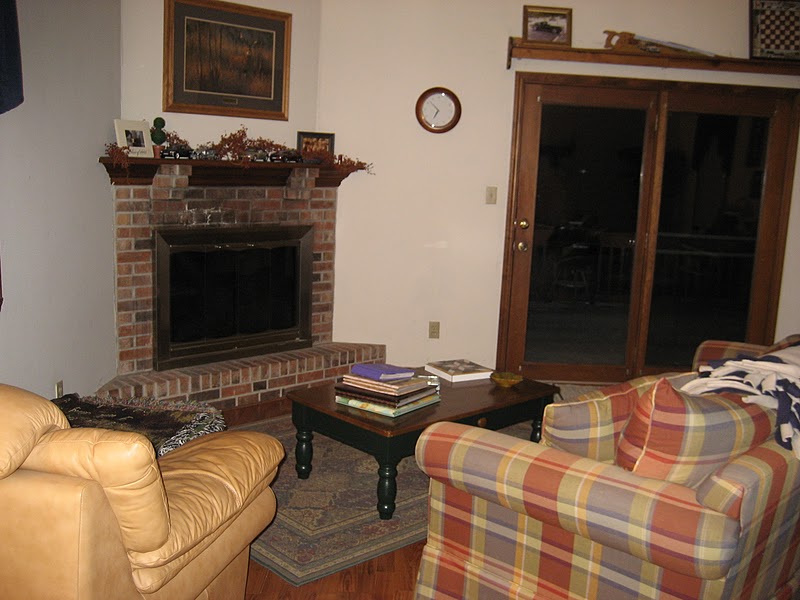
It really is by far the most spacious room in our home with vaulted ceilings and 3 large windows and a large sliding glass door overlooking our wooded 1 acre lot. There's even a working wood-burning fireplace in one corner. This was always our favorite room in the house, so when doing our whole house makeover over the past few years, we were determined to accentuate the positives of this room.

Here are some icky, yucky before photos. At that point in time, we used our front room as a TV room and had a dining area, piano and sitting area set up in this room. There was a lot going on.


We had purchased the couch and overstuffed leather chair and ottoman when we got married but practically everything else in the room was free/gifted from friends/ family members. Looking back, I cringe because I do not like all the patterns we had going on along with the dark wood trim. And the clutter and trinkets. That's the part I really don't like.

We went on a Bungalow tour of homes in Broad Ripple (a part of Indy) once and that day forever changed my perspective in decorating. I remember going into the homes and being amazed at how there was nothing sitting out. Now, that could be because they had 100's of strangers wandering thru their homes those days and they took their personal effects out, but....Dave & I were both struck with how much we loved the simplicity and peaceful feeling that no visual clutter evoked. So we set out on a 5 year journey of purging and decluttering in an effort to achieve that sparce look.

Nowadays we have our home staged to try to sell it so that explains why we pretty much have NOTHING out, but honestly, I love it. There's so much less for our 1 year old to get into, there's less to dust around, etc. I have just found that I'm a lot more apt to dust the top of a piece of furniture if I don't have to first unload 15 things from it!

So, getting back to the Great Room.... The walls were painted off-white with a flat paint by previous owners so over the years with normal wear and tear, they were beginning to look rather dingy and there were some nails and seams popping out of the drywall that needed to be repaired. We knew we wanted to choose a warmer color for the walls that would make the room feel cozier. We chose Valspar "Arid Plains" for the walls, from Lowe's. We painted the ceiling white and the trim and mantle a high gloss white.

The old flooring was cherry laminate. It had several areas that had gotten wet and bubbled over the years so it needed to be replaced. We opted for a speckled frieze carpet. The speckles make dirt seem less obvious and the soft carpet and pad are great for our little boy to play. Not to mention it is very comfy underfoot.


After 3 years of this room looking like this (it acted as a storage space as we worked on all the other rooms), it is so nice to have this space back!


This room formerly had 1 ceiling fan in the middle of the room and it was always too dark and sometimes a little stuffy since it was added onto the house so we added in a second ceiling fan and now the room stays nice and cool on hot summer days and is very well lit. We also ended up replacing the 3 windows and the patio door for more energy efficient models. That also drastically improved the heating/cooling in this added on room.

We purchased brushed nickel curtain rods from Lowe's and white IKEA Ritva curtain panels for a nice floor-to-ceiling look.

David purchased the N.A. Noel painting, "December" over the fireplace off ebay from someone all the way in Canada and reframed it with ancient oak barn siding from his parent's corn crib in Ohio that was damaged in a wind storm. The irony of that is the artist's gallery is located just 10 miles from our home! I think the frame adds so much to the painting. I just love it! There's chipped white and red paint on the wood that brings out the colors in the painting.


I purchased the woven storage ottoman shown below from Garden Ridge for just $25. It is extremely nice to have for Levi's toys and it forces us to edit his "collection" so that we don't end up with way more toys than we need in our living area. And even though he's only 13 months old he already knows how to clean up and put his toys away. He did it this afternoon without me even asking him to!


We reused our plaid sofa although I'd replace it with an IKEA Ektorp slipcovered sofa in a heartbeat if money were not an issue. We also reused our leather chair and ottoman. And we scored the dark brown leather loveseat from my parents' garage. Mom purchased it a few years ago then decided she needed a wider sofa rather than a loveseat.

The armoire in the corner, shown below, houses our home office. More can be found on that here. The straight back chair next to it was inherited from David's Aunt who got it from David's Granny.


I also hope to someday refinish the coffee table and matching end tables (that are currently in our guest room). They have dark wood tops and hunter green legs. You know their type. You probably saw them in many a home back in the early 90s. But I will wait for now until I decide more what color I want to go with and if I have a new couch or something.


And here's my attempt at doing what "The Nester" recommended on InCourage one day. Her idea is GENIUS! I placed this drop leaf table in the room with basically nothing on it. And I love it. It is very handy if I need a place to sit down and write a note or do the bills, or even I would ever have a chance to scrapbook or work a puzzle (ha! with a 1 year old I don't see that happening...). Once again, like with dusting, if I have to take the time to clear off a space to use it to work/play, it just won't happen! I don't want knick-knacks to get in the way of living around here.

It is SO nice to have a table other than the one we eat our meals at so we don't have to pick up what we're working on just to eat dinner.


Here's a rough breakdown (estimated from memory) on what we spent on this room transformation:

Drywall repair - we hired a professional to speed up the process due to the large size of this room and the vaulted ceilings - $1,500

Paint (for walls, ceiling, trim, primer also) - $165

Carpet - $820 (I definitely recommend shopping around - this was my 3rd stop, a local store, after estimates of $1600 and $1200 - and they installed it 3 days later as opposed to Lowe's schedule of 3 weeks out!)

New windows and door - $700 materials + $320 labor = $1020

Storage ottoman - $25

Computer Armoire - $100

And that's pretty much it since the rest of our furniture we already owned!

TOTAL - $3,630

Holy cow. Once again I'm pretty amazed at how much that cost us! But I still feel we were being pretty frugal. I need to figure out how other people do things cheaper! Cuz I already have so many other things that I'd love to do such as get a new sofa, a storage ottoman as big as our coffee table, new arm chairs, a rug, etc, etc, etc. Hhhhhhh....patience....But for fun, I did create a mood board here that helps me keep up hope that someday I can do a bit of a makeover.

I'm linking this up to the Roomspiration blog hop and link party at View Along the Way. Check it out for lots more living room inspiration.


9.14.2011

Meal Planner Follow Up

Since finding this meal planner/ Grocery list making - printout a couple weeks ago from The Project Girl


I've been doing a lot better job at planning meals and saving money at the grocery. I just find it so incredibly convenient jotting everything down on one sheet of paper.

In case you're wondering, here's what we've got on the menu for this week:

MONDAY - angel hair pasta & sausage meatballs

TUESDAY - Jammin' Deer Stew (the recipe calls for beef but I always use up venison stew meet in this...turns out great! and I generally add canned green beans, and frozen peas and corn and skip the bay leaves)

WEDNESDAY - Authentic chix enchiladas recipe (from my husband's authentic mexican coworker) - I'll definitely have to share this recipe soon. I also plan to make apple pie or apple dumplings with apples from the orchard this night too since we're having some friends over for dinner.

THURSDAY - Dave's late night, so we're on our own...I generally pack him something and snack on stuff around here.

FRIDAY - stromboli

SATURDAY - eating at the Wknd in the Word dinner at church

SUNDAY - Coffee Rubbed Deer Tenderloin, mashed potatoes and green beans

It was awesome because I only had to buy potatoes and chix breasts for meals this week as well as a few snacky things like yogurt and string cheese. Definitely helping keep the grocery budget down.

8.29.2011

Kitchen Post #10 - Financial Breakdown

Some of you may be wondering just how much our kitchen remodel ended up costing. I know I would have been curious before I started on our remodel... So I'm going to attempt to break it down here. These are all approximations that I'm pulling from memory...but they should be fairly realistic.

Actual DIY Kitchen Remodel Financial Breakdown
  1. Cherry Custom Cabinets (Tools, Lumber) - $3,400 (but $1,900 of that, the tools, can be used on future projects)
  2. Countertops - $1,500 (but $1,000 of that, the tools, can be used on future projects)
  3. Electrical - Free (bartered)
  4. Lighting - $300
  5. Appliances - $2,500
  6. Sink - $200
  7. Floor Tile & Supplies - $700
  8. Backsplash Tile & Supplies - $200
  9. Drywall / Painting Supplies - $150
________________________________________________________
Total = $8,950
(minus $2,000 of that which was tools that can be used on future woodworking/tiling projects)
Total = $6,950

For fun, let's consider what the same kitchen would have cost if we had paid for the labor and installation of custom-built cherry cabinets and granite slab countertops. Again, these are basic approximations...

Theoretical Kitchen Remodel Financial Breakdown

  1. Cherry Custom Cabinets - $12,000
  2. Granite Countertops - $3,700
  3. Electrical - $3,000
  4. Lighting - $500
  5. Appliances - $2,500
  6. Sink/Plumbing - $400
  7. Floor Tile & Supplies - $2,000
  8. Backsplash Tile & Supplies - $300
  9. Drywall/Painting - $1,000
________________________________________________________
Total = $25,400

So essentially we saved $18,450 by doing our kitchen ourselves. And possibly even more. I don't even know what plumbers / electricians / cabinet installers typically charge since I didn't have to pay any. Anyways, gotta love DIY, right? It's the way to go in all areas I'm finding. And I'm lucky I married a man who is a "Jack of All Trades". I truly think that's how I'm able to be a stay at home mom these days, since we save so much money on everything!

8.12.2011

Kitchen Post #3 - Cabinets Part A

Once we had decided on a new Kitchen Floorplan it was time to get a quote on the cabinets. We decided to go to Lowe's first. We began by looking at the in-stock cabinets. Even though we were very disappointed with their construction, we realized they would certainly look a lot better than what we currently had, but we noticed that the drawers were not dovetailed and that the bottoms of the drawers and the shelves were very flimsy. It would just be a matter of time until all the shelves and drawer bottoms were sagging under the weight of dishes. Just like our current ones...


But still, for kicks, we thought we'd get an estimate on what it would cost to buy all the in-stock cabinets for our kitchen. They came up with $4,300, if I remember right. Then the in-stock laminate countertops would be another $500 or so. So we were looking at nearly $5,000 and the cabinets would not be nice quality at all, and we would still need to purchase lighting, flooring, appliances, paint, etc. If we wanted to get nicer cabinets from Lowe's we knew that we could easily double that cabinet figure to $10,000 and if we wanted to pay someone to custom build the cabinets for us that price could triple or quadruple. We were very upset. We really only planned to spend about $5,000 on the entire kitchen remodel in all. We did not want to spend all that money and time and still feel that our kitchen wasn't nice quality. We would have just painted our existing cabinets, like a lot of people do for a quick kitchen makeover. But let's face it: our cabinets were WAY PAST THEIR PRIME.


The other problem was that when we looked at all the displays at Lowe's, the only ones that my husband, David, liked were the absolute most expensive cabinets on the market. The ones that had all kinds of molding on the top and bottom, the ones with alternating cabinet heights, etc. This kind of stuff:


I always say that I married a man with "expensive taste". Guess I was right...{Another interesting fact is that Lowe's didn't even show options like these at the Bellefontaine location near Patrick's house. Only here at the "elite" Zionsville Lowe's did they show off this kinds of stuff...}

So, with that, we went back to the drawing board. David & his brother Patrick began brainstorming. They both loved woodworking in high school. They had built a couple pieces of furniture themselves. They figured with the right tools they could probably build their own kitchen cabinets too. I had no idea how they were going to do it, but being the penny pincher that I am, I couldn't see spending $10,000+ on our kitchen cabinets alone. So...I decided to trust them. What other choice did I have? We had several people try to discourage them, including their own father, who is the one who taught them to be DIY-ers in the first place, and a dear friend who owns his own woodworking business. But in the end, that did not matter to David & Patrick. They just went ahead.

Patrick said if we could buy the tools, we could set them up in his shop in Ohio and he would do most of the work in exchange for being able to use the tools on his own kitchen someday. We thought that sounded like an amazing deal. So, in true Dave Ramsey fashion, Dave & I headed out to Lowe's "Tool World" one night with a stack of 100 dollar bills. We decided on what we wanted to buy - a DeWalt Planer, DeWalt Compound Miter Saw, and a DeWalt Table Saw and then we sought out the Lowe's salesguy. The total came to about $2,500 I believe. That was "not good enough", we said (only those of you who've been thru Dave Ramsey's Financial Peace class probably get that...). Dave bickered back and forth with the salesguy and the manager and we walked out of the store with everything for $1,900. My husband is a "hard man" the salesman told me as we wheeled our giant cart of tools out of the store and he helped us load them into the Jeep. He said we purchased the planer for only $3 over their cost. The next day we took the tools to Patrick in Ohio. He was like a kid on Christmas morning.

Then they headed out to an Amish man's lumber yard near Bellefontaine and bought a load of rough cut cherry for about $1,000. So for less than $3,000 we had purchased all the lumber and the tools necessary to build our custom cherry cabinets.


Now, all we needed were some cabinet building plans...hmmm....what to do about that....

So Dave & I went back to Lowe's and studied what we liked in more depth. We knew the layout/floorplan we wanted. But to actually build that required making tons of decisions on cabinet/door styles, etc. And drawing up those details. We ended up deciding we wanted something about like this display.


We liked the simpler flat panel doors, rather than raised panel doors. We figured they'd be slightly easier to construct. We also loved the arches on the faces of the wall cabinets. We weren't sure how we'd construct that, but oh well... We loved the crown molding and bottom molding on these cabinets as well.


We also decided that we wanted to add soft closers to the doors and drawers. This is an amazing feature that keeps you from slamming cupboard doors. And also keeps sleeping babies....well, asleep. :) 


Dave also insisted that the drawers be dovetailed. For Christmas that year, his dad got him and Patrick a dovetail jig which came in handy, for sure.


We also loved other details like this around the refrigerator. It really made it seem more built in.


And we studied other details such as the construction of the doors.  We determined what type of routers and roundover bits we'd need to purchase to mimic this.  Luckily, our dear friend, that same salesguy from the tool department, was available to walk us through that process as well.


We also spent a great deal of time studying how the corner cabinets would be constructed. If we'd have lazy susans, etc.  There were so many options.


And hardware was a whole other big deal. We really had to determine how far the door would overlay the face frame and how big the face frame would be before we could choose the hinge types. The more we got into this, the more we realized that we were, in a sense, re-inventing the wheel. But oh well, we had a pile of lumber sitting in a shed in Ohio and we were committed now.


The sales lady at Lowe's directed me to their hardware supplier, Courter Co, which just happens to be about 15 miles from our home. I went over there one day and came home with about $350 worth of hinges, soft closers, drawer slides, lazy susan hardware, etc. It would have easily cost us 5-10 times that ordering through Lowe's. Not to mention the guy at Courter Co was extremely helpful, in that he basically walked through the whole kitchen with me and told me exactly what I should buy. :) I love guys like that.

We also studied how the cabinets were put together. We purchased a Kreg jig so that we could pocket screw all the components together just like on our favorite display at Lowe's.


A few months later, David & Patrick had built this:


And another hundred or so hours of painstaking labor later, Patrick had built this:


And these:


Now, we just had to install them, put the countertops on, finish staining and polyurethaning every square inch of these puppies, add the crown mold, bottom mold, hardware, etc. And Patrick had to build all the doors. Whew! This was a big project. Stay tuned for Part B of the Cabinet Post.
Related Posts Plugin for WordPress, Blogger...