1.26.2012

Mandy's Master Bedroom Mood Board

A while back, well, a LONG while back, like a month before we moved, our cousin, Mandy, contacted me about brainstorming ideas for her master bedroom. I wanted to get some ideas back to her right away but I was hoping to get some photos first and then my life as I knew it basically blew up in my face.

So, long story short, I'm just now getting around to blogging about this and revealing a mood board that I created for her room.

Here's what she said, "Ok Katie, here is one of my many dilemmas: All the rooms in my house are white, and my husband, who hung each sheet of dry wall, is pretty insistent that they stay that way. The trim in each room is a mahogany type brown. The bedroom furniture we have is a hodgepodge of hand me downs, some pieces black, some brown. I'd love any ideas on how to pull them all together and make the room cohesive, for under $200."


At first, I was having trouble generating ideas because I felt so "thwarted" having to design around white walls and wood trim. I just didn't see how that could be done. But just in the past few weeks, I have read a few great blog posts that have inspired me to be more of the "work-with-what-you-have" mindset. 


Here is a post from Emily A. Clark's blog and here is another from The Handmade Home that discuss working with wood trim rather than painting it white (or some other color).


And here are a few of The Nester's inspiring thoughts on white walls. . .here and here. She even has an entire Pinterest board dedicated to white walls!
 

source


I also know that Mandy loved the master bedroom in our former home.


And she loves John & Sherry's first home's bedroom, from Young House Love. Um, who doesn't?? I am obsessed with the lighting and the built-in wardrobes flanking the bed. It's just so luxurious!


So, I whipped up a mood board using Olioboard with grays, browns and blues. 


To check out sources on any of the items, just go hereI'm not sure if Mandy's husband will like it, since it does seem slightly feminine. But, let's go with it for now.

I spent a bit of time sourcing very affordable options at stores I know are near Mandy to yield the same overall feel as the mood board.


First off, I think bedding is THE most important item in transforming a bedroom. I could NOT believe what a difference the bedding made in pulling together our master bedroom in our old place and making it look more polished.

Here's what it looked like before purchasing new bedding:


At here's what it looked like after I found our comforter and pillows at Home Goods on clearance for just $49!!


A quick online search yielded so many affordable options - at the time I even found some great clearance deals at JCPenney.

I suggest Mandy check out Lowe's for curtain panels similar to the blue ones shown in the mood board. That's where we scored the ones in our former master bedroom - and they typically range from $7-15 per panel. If you can sew, you could even buy just 1 panel per window and cut it down to make 2 panels, effectively cutting that already low price in half!! You could hang them on inexpensive tension rods or spend around $25 per window for decorative metallic rods.

I recommend that Mandy hit up Wal-Mart (or Garden Ridge or Target) for inexpensive throw pillows. I have seen several awesome Better Homes & Gardens throw pillows at Wal-Mart that I've been very tempted to purchase! One in particular that I recommend is this fabulous find for under $13:


Another tip that I have gleaned from The Nate Berkus Show is that you really don't have to have matching bedroom furniture. In fact, he's often encouraging guests to break up matchy bedroom suites by moving dressers into dining rooms or painting the matching bedroom pieces various colors, etc. I bet she could paint her mis-matched dressers and maybe even give them a distressed finish or even this fabulous mirrored treatment (that I know Mandy pinned already) . .


And Nate also suggests bringing in a comfy arm chair in the bedroom so you have a place to sit, other than the bed, to put on shoes or read a book. I've always been enamored with this idea and I'm thankful to now have a bedroom big enough to contain a sitting area!


I have not seen Mandy's bed to know if this is at all a good option or not, but she could always DIY an upholstered headboard to bring in another layer of interest to the room. There are tons of inspirational headboards on Pinterest.


And even in a bedroom that is already carpeted, I think an area rug can add a lot of character to the space. This 4 x 6 zebra print rug from Wal-Mart.com is only $114, with free shipping to your local store. And I've often seen rugs at Garden Ridge for $50-100.


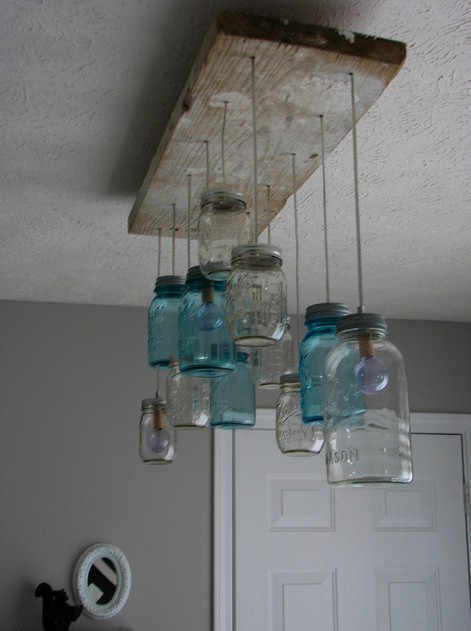
Personally, I also think lighting is hugely important in any space, but especially a bedroom. You want the bedroom well-lit enough you could read but also have the capability to set some mood lighting. I recommend an overhead light like the chandelier shown, with lamps on nightstands or dressers for some softer lighting. And I love the idea of checking thrift stores for old lamps or fixtures that can be painted and DIY-ed to create unique pieces.

So, given the ideas I've presented, I think Mandy could keep her white walls and wood trim, and with a little bargain hunting, she could probably re-decorate her bedroom within her $200 budget, picking and choosing some of the items suggested on the mood board.

For example, let's say she:

paints her existing dressers and adds new hardware - $50
buys a couple new throw pillows - $26
gets some bedding on clearance - $50
picks up a couple lamps at Goodwill - $24 total (and paints them with paint she already has)
"shops her house" for an armchair for the bedroom - $0
and finds an area rug on clearance at Garden Ridge - $50

Total - $200

It's totally do-able. What do you guys think? Anyone ready to redecorate their Master Bedroom now? I know I am!!! Now all I need is time and money! ;)

1.24.2012

Bathroom Organizing on the Brain

Last Thursday I decided to take on the beast that was our bathroom linen closet. *shudder* Don't judge me.


Since the day we moved in, whenever I unpacked a bathroom related box and found extra toiletries, I just threw them in there. In absolutely no particular order. This closet was like our best kept secret. I would have DIED if anyone had opened it up during a party searching for a band-aid or something. Er, not that anyone would do that. . .

At first glance it doesn't look that bad, but what you can't see is what is hiding inside those cute baskets. Sure, they look like they might even be categorized. But you could toss that illusion out the window the moment you pulled a basket off the shelf.

This is what you found inside those baskets.


Chaos. Mounded up, nearly overflowing, totally disorganized chaos. 

After buying 2 extra packages of Q-tips because I didn't even know we already had them (who wants to "check inventory" in a linen closet like this???), I decided it was time to tame this beast.

I dumped everything out on the bathroom counter (and in the sink!) and began sorting items and trashing things I no longer needed. The plus of having a double sink is that I could fill one up with junk and still have the other to rinse off leaking shampoo bottles, etc. Wow.


After only like 5 minutes of sorting and purging, we had ourselves a completely orderly space.


On the top shelf, from the left, is a basket for seasonal items (sunscreen, aloe, bug spray), followed by an ice cream container repurposed as a baby basket (baby powder, baby oil, wipes container), and a travel basket (contains our travel toiletry bag, extra travel bottles, etc.).

The next shelf down includes 2 matching baskets. The one on the left holds hand towels and the one on the right holds wash cloths.

On the next shelf down are some plastic drawer organizers that I recently purchased for paper organization in the office then realized I didn't need them once I actually filed...what a novel concept!?! So I repurposed them to contain our extra toiletries. There's one drawer for extra shampoo, one for extra bath soap, one for toothbrushes, paste, floss, and another for deodorant, and so on and so forth. 

And obviously the bottom shelf is for bath towels.


I still plan to label everything but if you've been following this blog long, you know that I ALWAYS procrastinate on labeling. I did the same thing back when I used to do scrapbooking, I'd always lay out the entire page with photos, borders, backgrounds, stickers, etc. and finish the entire book before I would ever start journaling and labeling photos with captions. So hopefully 2012 will be there year I actually get it together and label stuff. We'll see...I think I need one of those fancy schmancy vinyl cutter thing-a-ma-jiggers. Labeling would be more fun then. Or maybe that's just a marketing myth the creators of that thing want me to believe.

Anyways, moving on, I just love Pinterest. Not sure if you've joined but you need to. It is amazingly inspirational. Scouring that site for fantastic design ideas is my #1 favorite past time lately. And more often than not, I guess cuz I'm a nerd at heart, I'm drawn mostly to the Organizational Solutions.  So while we have bathroom organization on the brain, why don't you check out these 5 fabulous ideas I've pinned lately?

  • Contain bathroom counter top clutter with a cute little tray like Dana did over on House*Tweaking. She doesn't necessarily like having it all out in the open, but it's a temporary solution for their current apartment living situation.


  • Constantly keep hair dryers and straighteners tucked away inside the cabinet or a drawer by installing an outlet under the bathroom sink. We had an outlet under out bathroom sink in our old house and we LOVED it. I kept the blow dryer plugged in all the time but just took it out when needed.


  • Build storage cubbies inside the walls between studs in really small bathrooms, just like an inset medicine cabinet!


  • Repurpose jam jars as toiletry storage. Here I am on the whole canning jar kick again. Haha...

  • Use PVC pipe for curling iron storage on the inside of the sink cabinet door.


What other fabulous bathroom storage solutions have you all come up with? Tamed any beasts in your home lately? I know I sure feel better after cleaning up that linen closet!! I don't know why I put it off for so long. It seriously did not take very much time.

The Story of the New Coffee Maker

Saturday our coffee maker quit working.  I was rather distraught since I was having one of those days. You know, the type where you wake up late to a child screaming like a pterodactyl for his bottle and a blaring alarm clock that has been snoozed repeatedly for the last hour and a half. I bolted out of bed, threw on some exercise pants and a t-shirt, no time to shower, tried to brush my ratty hair and stumbled to Levi's room and got him and then set straight to work preparing breakfasts, doing laundry, dealing with invoices for the garage, answering phone calls, etc, etc. So when I finally got our little man down for a nap in the afternoon, I thought there could be nothing better than a hot cup of energizing coffee. And maybe a shower. But first, coffee. 

So I filled the pot with water and coffee grounds and hit the button and nothing happened. So I hit it again. {This has happened twice before and it always redeemed itself.} But nothing...again. Grrrrr....


So I called my honey, who was out running errands, and asked him to please stop in at the local Wal-Mart and pick me up a new one. He refused {since he has something against Wal-Mart} and I was bummed. 

So we borrowed a backup pot that my brother-in-law keeps in the barn for my afternoon coffee. Hallelujah. And then that night we used this as an excuse to go out to eat and shop for a new coffee maker. {Any excuse will do for eating out around these parts.} We were pleasantly surprised to find a Bed Bath & Beyond nearby the restaurant we went to. I went in and quickly located a $29.99 Mr. Coffee model that I thought would do the trick. And it was short enough to fit under our wall cabinets {there is only 13.5" of clearance over our counters rather than the standard 18"}. 


I was thrilled to be buying a coffee maker that would hold a large amount of coffee, keep it warm, and even perform a delayed brew first thing in the morning! We had never had those luxuries with our 2 - cup to go model. It had been fabulous, don't get me wrong, and we didn't even buy it. My friend, Camille, gave it to us once cuz she didn't want it. When we first got it, it definitely served us perfectly well cuz we really only brewed coffee once in a blue moon if we had java-loving house guests or we wanted to make a frozen java for dessert. But over the past few years, since having our little one, and getting older ourselves, we've become more and more dependent on the caffeine. And we've found it increasingly annoying that our coffee maker could really only brew enough for 2 people {not fun when entertaining} and didn't keep it warm long. In fact, we even discussed how we felt we were somehow entering adulthood officially by getting a new coffee maker that would have all those bells and whistles. 

So, before we headed to the checkout with the Mr. Coffee machine, Dave said he wanted to look over all the options. I was exasperated, to say the least. See, if you know my husband, you know that if he goes shopping, he will come home with the most expensive option. You'll love whatever it is, no doubt, but you'll pay for it :) So, being the tightwad of this marriage, and knowing where this could go, I tried my best to restrain him, to distract him. . .to no avail.

It wasn't 5 seconds later that he spotted this puppy.


The DeLonghi Combination Drip Coffee, Espresso, Cappuccino and Latte Machine.

For $149.99!!!!!!!!!!!!!!!!!!!!!!

I about had a heart attack. {And I know, I know, it could have been worse. There are plenty of $1,000+ espresso machines out there. . .but this is reality and $149.99 is a big deal to me right now.}

I tried my best to talk him out of it. We argued and deliberated. He said he only really likes espresso drinks and not regular brewed coffee. And I agreed that I did prefer them as well. Then he further justified the purchase by explaining that it would seriously cut down on his frequent trips to The Depot Coffee House and Starbucks for $4 white mochas. That did make it seem a bit less pricey in the long-run.

So he called my sister, former Crate & Barrel associate, and in-family expert on all things kitchen. She ok'd it and even mentioned that Crate & Barrel sells the same thing for $129. Then Dave used Dave Ramsey bargaining tactics and sweet-talked the BB&B folks into price-matching and we walked out the door with our DeLonghi for about 15% off :)

And after spending a few days getting the right type of coffee and reading the manual {er, Dave reading the manual. . .} and all that, we have successfully made a couple at-home mocha lattes and I am THRILLED with this purchase. It was well worth the money for our household and I think it will save us hundreds of dollars this year. Easily. Even if we did have to spend so much to begin with.

Anyone else OBSESSED with coffee lately? Do you have a favorite espresso machine or coffee maker? What other types of kitchen gadgets are you so thankful to have?

1.23.2012

Jars & Canisters

So one week ago today I was dealing with the big question of whether or not to buy canisters

The day before I totally had my eye set on some cute canisters at Target. But they didn't have enough on the store shelf, so I resisted purchasing any there. Then I came home and even so much as loaded these puppies into my Amazon shopping cart. . . 


along with a few chalkboard labels. . .


I wanted so badly to duplicate the look of these fun canisters on Dina's baking cart.


But I just couldn't see shelling out that money right now. It was going to be at least $60 to buy what I wanted. So I cancelled the order and went back to the daily grind of changing diapers and sweeping floors.

Then, later that day, I was working in the kitchen unloading the dishwasher and clearing the countertops and I had an idea...why not use canning jars as canisters??? 

We already use them as our primary drinking glasses around these parts. We find them charming and whimsical. 

So I gathered up a few larger ones that were laying around the house and began filling them with goodies - tea bags, Cheerios, brown sugar, sugar and coffee. I figured, why not give it a try? I'm out absolutely nothing and if it doesn't work well, I can scrap the idea and buy my dream $60 worth of canisters and labels. . .


But, so far, I am LOVING our jars-turned-canisters. I'm finding it extremely handy to have these frequently used items out on the countertop, the display looks cute and the best part of the whole thing - it was FREE. :) Makes a nerd like me happy, at least.


I contemplated labeling them somehow, and I may still, but in all reality, it's pretty self-explanatory and I'm just not sure I like the idea of affixing a label to the jars and covering up the Ball, Kerr, Mason labels that are stamped in the glass.

Of course, the day after I did it, I found this image on Pinterest from an etsy shop.


So I guess I'm not the first one to think of something like this. :)

What do you use canning jars for? Anything besides real life canning? I've been using them a lot lately to organize. In fact, I'll probably be posting again sometime soon with more glass jar storage ideas. 

1.18.2012

Nate Berkus agrees - the Armoire ROCKS!

Remember how I wrote an entire post back in November praising the versatility of the armoire? I love them because you can use them as a home office, a coat closet when you don't have one, a craft station, or a pantry. Pretty much WHATEVER YOU WANT.

Here's a photo of our old home office setup in the armoire back in Indiana:


And here's an example of how you can use one for an entryway closet:


Or craft storage:


Or as a pantry in the kitchen:


I just love armoires!

So you can probably imagine my excitement when I was watching video clips over on The Nate Berkus Show site, and he made over a standard computer armoire for a guest. I could not wait to see what he did! Here's the video clip from his show. . .you have to see it!

. . .I just love how he points out how great it is that you can just shut the doors on your home office when you keep it in an armoire. And I love how he personalized the piece by lining the insides of the doors with cork to add tons of function and the outside door panels with a vintage print wallpaper to beautify the piece. I love his work. . .

And while we're on the subject, here are a few more inspirational armoires I've seen over on Pinterest lately. All I can say is "WOW". This piece of furniture ROCKS! You can just do SO MUCH with it.

Craft storage:


Additional storage for clothes and toys in a child's bedroom:


Ample shoe storage:


You know, my mom did this in her laundry room over 15 years ago. It was fabulous when my sister and I were living at home and we all 3 combined had so many shoes!!

You can even just use an armoire, like this one with glass doors, for book / trinket displays in a living area:


Or better yet, why not use it as a place for your childrens' toys and games and craft supplies? I love how they used a towel rod hanging from a shelf for butcher paper for the kids, and added chalkboards to the inside of the door...and used labels on the drawers to identify where toys belong. 


Anyone made over an armoire lately? What do you use yours for?

1.16.2012

Canisters - To Buy or Not To Buy

Good morning everyone! It feels good to be coming back to you on an early Monday morning once again. I apologize for the sporadic posts lately, but with the move, the holidays and the new business, things have been chaotic for me, to say the least. I'm hoping to get back into a groove of posting about 3 times a week again, starting this week. So, thanks for bearing with me during this transitional time, I sure do appreciate it! :)

And now, onto the point of this little post. . .


As much as I love the look of a completely cleared off kitchen counter top. . .and strive for it on a daily basis .  .


. . .lately I've been considering investing in a canister set. We had one long ago and then got rid of it because we had zero counter space in our old kitchen (before the remodel) and didn't like having them out taking up precious work space.

So now that we have actual counter space here in our new house, I think it might be fun to keep our coffee, tea bags, sugar, flour, and maybe Levi's "O's" {Cheerios} at arm's reach. I recently saw this "breakfast station post" on Honey & Fitz, where I got the idea of keeping the cereal in a canister. And I just LOVE those plain glass canisters with glass lids.


And I'd love to use Dina's idea of vinyl chalkboard labels. How fun!


Or these cute labels by The House of Smiths.


So what do you think? Do any of you have canisters on your counter tops? Do you like keeping things handy or do you feel like they clutter up your kitchen? Should I put these on my "Wish List"?

1.12.2012

2012 House Goals

I think that I mentioned before on here that we are currently "renting" our house from Dave's parents with the plan to buy it at some point, and starting our own automotive business with no idea what kind of income we'll make in 2012. So, as one might imagine, it is pretty difficult for me to plan and actually set House Goals for 2012 since there are so many unknowns.


But . . .the Nester is having a giant 2012 Home Goals Linky Party and I just really don't want to be left out!! 


So. . . I'm going to just write down some goals. Things I would like to do to the house IF the owners approve it and IF I actually have room in the budget to do it. And oh yeah, I'm one of those people who really overestimates the amount of stuff they can cram into any one period of time. So this list would probably take an entire decade in all reality ;) At least at our rate. . .


Kitchen:


As a reminder, this is what it currently looks like:


Well, actually, I have cleaned off the countertops so that's a good start. And we got an oven. ;)


1.  I'd like to freshen up the cabinets with some nice clean, white paint. I'm not a huge fan of the two-tone look we are sporting now and the cabinets that are painted white are worn in places. I think this would make the room look awesome. And we'd probably take the cabinets out above the stove and install some beadboard and open shelving. Maybe kinda of like this picture. Cuz we have a new stainless steel microwave we'd like to install similar to this.


2.  Another thing I might consider would be to install a new countertop or use a Rustoleum Transformations kit on the counters - I'm thinking a gray countertop (like shown above) would be nice with the white cabinets {and the existing blue and white linoleum}. The existing counters seem to have lost their finish so things like coffee, tea, jam, etc. stain them very easily so it would be nice to do something with them. 


3.  Then I'd also like to remove the wallpaper on the accent wall and the border around the room *cringe* and repaint the room...I hate removing wallpaper. To get a perspective here, my sis-in-law once said (as she worked her way around our old kitchen removing the border for me since I was 8 months pregnant) that removing wallpaper must be what the devil makes people do in hell. I agree wholeheartedly.


4. If money grew on trees, of course we'd probably gut the kitchen, open it up to the family room or the dining room some more, come up with a whole new layout, install a farmhouse sink and expensive faucet, wood floors, build our own cabinets (hickory or cherry or painted white), install marble counters or DIY concrete counters or something all amazing and what not. ;) Something like this. . .but yeah, I'm still looking for a money tree ;)


Master Bath:


1.  Put up one of our white waffle weave shower curtains in place of the glass door (some people just love those glass shower doors but we're not fans. we feel claustrophobic in there and it makes it dark and they're so hard to clean...I like being able to throw away a $2 liner from the dollar store and put up a new one periodically in lieu of cleaning...haha)


2.  Decide on a better curtain for the window (my makeshift $2 garage sale shower curtain turned window treatment is NOT cute)

3.  Paint the walls a nice neutral color like off-white, since I already happen to have an entire gallon from our old guest room in our old house (and remove the wallpaper border *sigh*)...and if I owned the place, paint all the trim and cabinets white :) - and well, that white trim paint goes for pretty much the entire house ;)


4. Replace the powder blue toilet with wood seat/lid. You have to jiggle the handle and fiddle with the thing nearly everysingletime you use it. It drove us absolutely crazy when we first moved in, but it is somehow miraculously not as bad now. Still, I would like to replace it with a plain white toilet. One that you can use and then flush with confidence. Like our Kohler Wellworths in our old house *sniffle* sometimes I really, really miss that house.


4.  DIY some sort of cute tray for between the two sinks for our toothbrush, soap, lotions, etc. like this adorable picture frame turned bathroom tray:


5.  Frame the large mirror over the sink with decorative moulding (this will most likely not happen in 2012 but I might as well throw it out there...just look at these amazing transformations I found on Pinterest!)


Master Bedroom:


1.  Get some new curtain rods, probably an oil rubbed bronze finish, and possibly some bamboo blinds, and I already have some gold sheer panels I plan to hang up WHEN I get those rods.

2.  Repaint the walls - I'm thinking a color like our old great room would be nice and look fabulous with the brick accent wall that is opposite our headboard in the photo above - that paint color sure looked nice with our old brick fireplace, don't ya think?


3.  Organize the closets (there are 3 in that room!! I could pinch myself!), add in some shelves or drawers in one of them - so that we can eliminate the need for one of our dressers and move it into the dining room as a console (Gotta love shopping the house!) 

Levi's room:


1.  Paint or wallpaper or something to cover that cloud/kite wallpaper. Thankfully Levi doesn't seem to mind it (apparently 18 month olds don't care about interior design), but I would like to update it. Right now I'm considering a red, white and blue theme {since the carpet is red, but it's also old and either needs to be torn out and replaced or left with the hardwood floors showing and a large area rug}. I don't know...I think "big boy rooms" are difficult to decorate. And of course if/when we ever have another baby this will remain the nursery so I probably should stay neutral in case we would have a girl. So...maybe not red, white and blue...? Obviously, I'm still working on this. All these ideas are half-baked.


2. I am considering putting fabric on the walls (using liquid starch that doesn't damage the walls according to Nate Berkus) or just on an accent wall, maybe? Just saw this cute burlap accent wall on the Bower Power Blog. I love it. They stapled the burlap to the wall.


And then today I had this random thought of creating a collage of quilts that we already own all over Levi's walls. Strange, I know, but it might be fun. Gotta use what you already have when on a budget.


3. Would also like to get Levi some cute curtains and a curtain rod. 


Levi's Bathroom:


1. Put up some sort of curtain


2. Get another new toilet. I only use this one in absolute emergencies it's so unreliable.


2.  Hang baskets like these on the wall for towel storage over the toilet and I think they'd add nice welcoming texture to the space and pull out the earthy colors in the linoleum


Living room:


I've got the green light from my father-in-law to paint this space. And I already shared some of my plans and inspirational photos...I'm planning to paint it gray with crisp white trim. And I even picked a few of my favorite shades of gray already. 


But something is holding me back. Not sure if it's plain old procrastination (since painting doesn't really rank up there as one of my fav past times) or just really not being sold on my first idea. Or well, life, in general. We're super busy and overwhelmed with starting the business.  

But the thing is, this room is on the northeast side of the house, surrounded by some large trees and it doesn't get a ton of light (other than very first thing in the morning). And I just crave light. And I keep fearing that even if I choose a lighter shade of gray that I'll still feel like it's too dark in there and then I won't want to be in there. And the living room and dining room are my absolute favorite rooms in the house cuz they remind me of how old the house is. I love history. And the walls are off-white now and it already seems dark. So I've actually been considering taking cues from Levi's bathroom (which you can also access from the living room, that my sister-in-law I believe recently repainted). It is stark white. And I love it. You can do anything with white.


Dave's totally not sold on the idea, but I told him that I think I'll just prime the entire room (ceiling, walls, trim) before buying the gray paint and then it will be "white" and we can decide how we like it before we commit to buying the gray paint.

Just check out these images I've gathered on Pinterest of white living rooms.


The last thing I want is a "sterile" living room. But I feel like with the right furniture and accessories it can still feel very warm and welcoming. In fact, I didn't even realize that last inspirational photo was a white room until I was looking back thru my pin boards. I originally pinned it cuz I love that West Elm rug. :) But now I see that the room is stark white yet feels very cozy.

I also love all the colorful pillows in the top image. And I have to remind myself that we'll be using our dark leather sofa too so that will make it feel very warm and cozy too.

So, basically, when I figure it all out, we'll be

1. Priming and painting the living room.

2. Upgrading the light fixture with a little DIY work or replacing it with a drum shade or something.

3. Hanging a fun-filled photo gallery wall somewhere in there or in the dining room...?

4. Possibly slipcovering an old couch that's down in the basement and bringing it up in the living room for additional seating.

5. And possibly DIY-ing a tufted ottoman from the coffee table in our family room.

6. And if we have a load of extra $$ late in the year, we'd love to update that carpeting! Ah!


Dining room:


1. I'd love to remove the wallpaper in the dining room and repaint the space. And I might leave 1 accent wall wallpapered and use this Allen + Roth Spanish Tile wallpaper from Lowe's. If the living room is gray. If it's white, then all these dining room plans will be revised. . .


2. I'm considering yanking the largest dresser out of our master bedroom and painting it a dark plum color like this:


I was actually sitting here one night thinking how lovely plum would look with gray walls and the wood of the dining room table so I searched Pinterest for a plum dresser and this one from Twice Lovely is the only one that came up. But it's basically exactly what I want to do. I love the Internet. ;)


And I'm dreaming of flanking the dresser- turned- console with two matching lamps and hanging a mirror over it, kind of like this:


I also think it might be fun to DIY a mason jar or other type of chandelier over the dining table.


Office:


We'd like to finish styling the office shelves like I mentioned here, upgrade the lighting (we might just install some super industrial, unsightly light like we had in our old laundry room


since I spend 90% of my days trying to do paperwork in this area and will someday homeschool Levi in this area or we might just move the flush mount fixture from the dining room into here to raise the light location and hopefully diffuse light father across the room), and we'd also like to add pull out file drawer mechanisms in the lower half of the built-ins. Right now I'm keeping files in there in file boxes and milk crates but it would be easier if they were file drawers.

Family room:


We might paint this room and get new curtains, I dont' know. We're still just trying to get used to living here and see what we use the rooms for. It's interesting having two living areas and two dining areas. We've certainly never had that before and so far we're just not sure what to do with it!


Mud room:


Actually FINISH the storage unit - paint the whole thing white and the inside of the cubbies a fun color, add a bench to this area, and maybe paint the wood paneling...I think it would brighten up this space and go a long way in creating the "sunroom" atmosphere that I'm going for on the east end.

And then there's also tweaking to do to the guest room, patio, spare bedroom, basement and garage, but all that will probably take place on an as-needed basis. Like the guest room will get cleaned / redecorated when we have guests visiting and we'll set up our furniture on the patio and clean the garage when the weather is nice in the spring. For now, those projects will wait.


Well, who am I kidding? Probably a lot of this will wait. A while. But I still love dreaming and I can't wait to make some of this a reality. :) 2012 should be a wild ride for sure!
Related Posts Plugin for WordPress, Blogger...