Showing posts with label Bedroom. Show all posts

1.26.2012

Mandy's Master Bedroom Mood Board

A while back, well, a LONG while back, like a month before we moved, our cousin, Mandy, contacted me about brainstorming ideas for her master bedroom. I wanted to get some ideas back to her right away but I was hoping to get some photos first and then my life as I knew it basically blew up in my face.

So, long story short, I'm just now getting around to blogging about this and revealing a mood board that I created for her room.

Here's what she said, "Ok Katie, here is one of my many dilemmas: All the rooms in my house are white, and my husband, who hung each sheet of dry wall, is pretty insistent that they stay that way. The trim in each room is a mahogany type brown. The bedroom furniture we have is a hodgepodge of hand me downs, some pieces black, some brown. I'd love any ideas on how to pull them all together and make the room cohesive, for under $200."


At first, I was having trouble generating ideas because I felt so "thwarted" having to design around white walls and wood trim. I just didn't see how that could be done. But just in the past few weeks, I have read a few great blog posts that have inspired me to be more of the "work-with-what-you-have" mindset. 


Here is a post from Emily A. Clark's blog and here is another from The Handmade Home that discuss working with wood trim rather than painting it white (or some other color).


And here are a few of The Nester's inspiring thoughts on white walls. . .here and here. She even has an entire Pinterest board dedicated to white walls!
 

source


I also know that Mandy loved the master bedroom in our former home.


And she loves John & Sherry's first home's bedroom, from Young House Love. Um, who doesn't?? I am obsessed with the lighting and the built-in wardrobes flanking the bed. It's just so luxurious!


So, I whipped up a mood board using Olioboard with grays, browns and blues. 


To check out sources on any of the items, just go hereI'm not sure if Mandy's husband will like it, since it does seem slightly feminine. But, let's go with it for now.

I spent a bit of time sourcing very affordable options at stores I know are near Mandy to yield the same overall feel as the mood board.


First off, I think bedding is THE most important item in transforming a bedroom. I could NOT believe what a difference the bedding made in pulling together our master bedroom in our old place and making it look more polished.

Here's what it looked like before purchasing new bedding:


At here's what it looked like after I found our comforter and pillows at Home Goods on clearance for just $49!!


A quick online search yielded so many affordable options - at the time I even found some great clearance deals at JCPenney.

I suggest Mandy check out Lowe's for curtain panels similar to the blue ones shown in the mood board. That's where we scored the ones in our former master bedroom - and they typically range from $7-15 per panel. If you can sew, you could even buy just 1 panel per window and cut it down to make 2 panels, effectively cutting that already low price in half!! You could hang them on inexpensive tension rods or spend around $25 per window for decorative metallic rods.

I recommend that Mandy hit up Wal-Mart (or Garden Ridge or Target) for inexpensive throw pillows. I have seen several awesome Better Homes & Gardens throw pillows at Wal-Mart that I've been very tempted to purchase! One in particular that I recommend is this fabulous find for under $13:


Another tip that I have gleaned from The Nate Berkus Show is that you really don't have to have matching bedroom furniture. In fact, he's often encouraging guests to break up matchy bedroom suites by moving dressers into dining rooms or painting the matching bedroom pieces various colors, etc. I bet she could paint her mis-matched dressers and maybe even give them a distressed finish or even this fabulous mirrored treatment (that I know Mandy pinned already) . .


And Nate also suggests bringing in a comfy arm chair in the bedroom so you have a place to sit, other than the bed, to put on shoes or read a book. I've always been enamored with this idea and I'm thankful to now have a bedroom big enough to contain a sitting area!


I have not seen Mandy's bed to know if this is at all a good option or not, but she could always DIY an upholstered headboard to bring in another layer of interest to the room. There are tons of inspirational headboards on Pinterest.


And even in a bedroom that is already carpeted, I think an area rug can add a lot of character to the space. This 4 x 6 zebra print rug from Wal-Mart.com is only $114, with free shipping to your local store. And I've often seen rugs at Garden Ridge for $50-100.


Personally, I also think lighting is hugely important in any space, but especially a bedroom. You want the bedroom well-lit enough you could read but also have the capability to set some mood lighting. I recommend an overhead light like the chandelier shown, with lamps on nightstands or dressers for some softer lighting. And I love the idea of checking thrift stores for old lamps or fixtures that can be painted and DIY-ed to create unique pieces.

So, given the ideas I've presented, I think Mandy could keep her white walls and wood trim, and with a little bargain hunting, she could probably re-decorate her bedroom within her $200 budget, picking and choosing some of the items suggested on the mood board.

For example, let's say she:

paints her existing dressers and adds new hardware - $50
buys a couple new throw pillows - $26
gets some bedding on clearance - $50
picks up a couple lamps at Goodwill - $24 total (and paints them with paint she already has)
"shops her house" for an armchair for the bedroom - $0
and finds an area rug on clearance at Garden Ridge - $50

Total - $200

It's totally do-able. What do you guys think? Anyone ready to redecorate their Master Bedroom now? I know I am!!! Now all I need is time and money! ;)

11.07.2011

Most Versatile Piece of Furniture - The Armoire

You know, I'm beginning to think that armoires are one of the most versatile pieces of furniture in the entire world. They rank right up there with dressers and storage ottomans, but we'll save those for another time. ;)

After moving our office into a computer armoire that we scored for $100 from Craigslist back in August, I just CANNOT stop singing the praises of the armoire.


There's just something so appealing about forcing yourself to contain all the clutter of one aspect of your home inside a nice cute little piece of furniture that you can easily close the door on.


I could have one in every room of the home. You can use them to hide TVs or computers, or you can set up a little craft or sewing station like these gals did:


Or you can use them for clothes in a bedroom that lacks a closet!


Or create a stand-in coat closet in an entry way that lacks one...like I mentioned in last week's post.


Or you can repurpose your armoire as a freestanding pantry for food or dishes in a kitchen that lacks cabinet space.


And while you're at it, check out this fabulous armoire makeover by Lisa from Recaptured Charm. The before/after is amazing!


The possibilities with armoires are endless...craft cabinet for the kids, book storage, DVD storage, CD storage, a place to keep files that's much cuter than a metal filing cabinet. You can line the inside with gorgeous wallpaper, fabric, paint it a bright color. You can do anything with this piece of furniture. And they are pretty easy to come by at garage sales, flea markets, Craigslist. Also, as Ange, from The Blooming Hydrangea, pointed out to me once, the fabulous thing is that you can take an armoire with you when you move! ...Can you tell I have moving on the brain? Just one more week. . .

What other pieces of furniture do you find extremely versatile in your home? Have any of you used an armoire for a surprising purpose that I did not mention here?

10.17.2011

Day 17 - Clutter Free Kids' Rooms

Welcome to Day 17 of the 31 Days to a Clutter Free Home series. We're back to working our way through the home this lovely Monday morning - moving onto kids' rooms.

Our first baby, Levi, is 15 months old. So I will in no way claim to be an expert in kids' rooms. Still, my short experience so far has taught me that LESS is so much MORE.

I'm going to talk about de-cluttering pertaining to kids' clothes and toys later this week, so I won't spend a lot of time on those topics today.

Basically, the point I want to get across is that even if you live in the good ol' U.S.A. like me, the land of extreme abundance, you DO NOT need all that stuff from Babies R Us or Target for your baby. Their sales ads might lead you to believe that you do need all those gadgets with all those bells and whistles and that you would be an unfit parent if you didn't buy it all, but I'm here to tell you it will be ok.

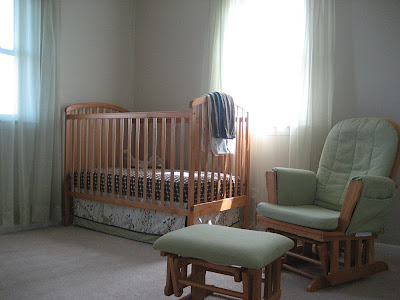
In Levi's room, we have a crib (with a teddy bear in it), a glider / ottoman, a dresser and a bookshelf with some books and toys. And he is completely content. For a couple months we used a swing. And another couple months he enjoyed his exercauser. Other than that, we don't have much else for him.


Every baby is different. One baby may just love an exercauser while another baby might prefer to lay on a blanket rolling over. My advice is to wait and see your baby's personalitiy and then buy the extras based on that. So, before your baby is born, all you need is a bassinette/crib, a rocker of some sort, and a place to store clothes and diapers, and clothes and diapers and wipes. Life will be so much easier and your home will feel more spacious if you don't rush out and buy every gadget known to baby.

And once your kids get older, it is important to periodically re-evalutate their needs. Even in Levi's short life, I've re-organized his room probably 5 times. Pack up (for the next child) or donate toys that they've outgrown. Always work on editing your belongings to simplify your life. And most importantly, remember that it's ok, as the parent, to say NO when they want the next "whatever".

9.30.2011

Master Bedroom Reveal and Roomspiration Link Up

I wanted to post this Master Bedroom Reveal for you earlier today but I had some technical difficulties and had to finish it tonight. I'm trying to cram it in before the "31 Days to a Clutter Free Home" series starts tomorrow. And I guess I'm sliding in right at the deadline with 56 minutes to spare....nothing like last minute!

Our Master Bedroom is always a work in progress. It has been collected over years and will most likely continue to evolve. Overall our goals are to create a neat and clean, peaceful sanctuary to rest in.

I purchased the oak headboard (frame and mattress) as well as two oak dressers when I was in the 8th grade. I am proud to say that as a 14 year old I had saved up enough cash on my own to buy these pieces. They are not really what I would choose today if I were to go buy bedroom furniture but I am thankful for them.

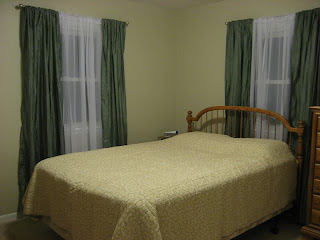
This is what our Master Bedroom used to look like. I chose this green color and painted it the year we moved in. I thought it would be a tranquil color but it was a lot darker than what I was going for and just was not the peaceful look I was going for. The curtains and hideous green carpet were inherited from the previous owners.


While repairing drywall and repainting our bedroom in 2010, we used our spare bedroom. I knew I wanted to go with a blue and brown color scheme so I went ahead and purchased the blue crinkle voile curtain panels from Lowe’s for $14.99 / each and hung them in that room. And the white sheer panel to go in between was also from Lowe’s for $9.99. I think the curtains are one of my favorite things about our bedroom now. Our old curtains were short and made the windows look so small. From reading other people's blogs I picked up on the idea of putting long panels on even short windows and I love it. It gives the room a much more luxurious feel.
We already owned the quilt shown below. I was determined not to spend money so I figured it would work well enough with my new color scheme. It was even reversible. In the end we realized it was not the look we were going for. Nor was the lack of bed skirt :)


So once we got settled back in our bedroom with our curtains put up in there, we decided to invest in some bedding. I found this blue and brown leafy comforter and matching shams and pillows for only $49.99 on clearance at Home Goods. It was meant to be!


The same day that I found the comforter set I also found the lamp on the nightstand. It was only $29 at Home Goods so of course I fell in love…and it fell into my cart…


I had already purchased the 2 blue silk pillows from Home Goods the year before for $25 and I had purchased the silky brown lumbar pillow from IKEA several years ago (no clue how much it was) and the brown one in the middle of the 3 from Garden Ridge for just $9.99.


We “shopped our house” and decided the bedroom would be a great place to display our Hayden Lambson print that we’d purchased years ago from…get this: a truck stop! Doesn’t everyone find their home decor near the ladies room while making a pit stop? It had an oak frame so it matched the furniture and the blue mat matched the bedding and didn’t really match any other rooms in our house anymore, so it was a fit!


I found this darling little green storage ottoman on clearance at Home Goods for just $35. I could hardly believe my eyes and the cashier was even surprised when she rang it up. To this day have found absolutely nothing wrong with it to indicate why it was on clearance. I wanted a chair in our bedroom but realized this ottoman is much better because I can throw random things in it that have no other home and no one’s the wiser.


At first when we moved back in the room, we had a little problem with furniture arrangement…and well, pillow arrangement, too…LOL. See the photo below.


We tried placing our dresser on the left side of the room when you walk in the door and having a somewhat large night stand on the right side. Something about the window placement on the right side of the room really made the space seem so off balance.
 
Also we don’t have a TON of space to work with since the room is only about 11’ x 11’ and the bathroom door and door out to the rest of the house are placed so that one entire wall can’t really be used for furnishings.


So one weekend I asked my mom and sister to help me with this furniture arranging nightmare and we moved things all around trying different scenarios. One of us came up with the idea of removing the mirror from the dresser so that it could be placed in front of the window and not look too odd.


Lo and behold, that made a huge difference!


Having the dresser on that side of the room makes it seem much more balanced when you look in. We also thought we should find a smaller night stand.


I shopped the house and found this antique end table from the living room. It is a smaller size and works better in the smaller bedroom. It belonged to my great grandmother and was always in my bedroom when I was a little girl.


After years of having a night stand with no storage, I am so glad to have these handy drawers to keep all my random junk handy….coaster, pens, hairbands, chapstick.  Sure, the drawer could use a little organizing in itself, but it works.

  
So what do you think of our Master Bedroom? There are times I look at it and wish it was a bit more flashy and colorful or that I had mixed in a few more fun patterns, but for now, with the small space we have I don’t want it to be too busy. I think that it works and keeps it feeling cozy and restful.

I’m linking this room up to the Roomspiration Blog Hop on Just a Touch of Gray. Have a great weekend!


9.20.2011

Budget Guest Bedroom Makeover

A few months back, this is what our guest room/ office looked like. Not so inviting, eh? So I decided to do a ton of purging and relocate the office to an armoire in the Great Room. And that left us with a completely empty guest bedroom.


Before we had our baby, we had possessed a full size bed but had since given that back to Dave's parents, it's rightful owners. So we pretty much had nowhere for guests to sleep. When we did have guests, we gave them our bed and slept on the floor on 4" thick foam sleeping mats meant for tent camping. So something had to be done. Because I spent way too many nights as a pregnant woman sleeping on the floor!! Ah!

However, I didn't really like the idea of having a whole bed set up in this room all the time because it's small anyways (about 9 x 12) and I like to be able to use it for other things if need be. So after reading this post from Young House Love, I thought, "why don't I get a sleep sofa?" It can be tucked away except when we have visitors.

But since we'd just spent a fortune on just about every other aspect of our house, I knew that I couldn't really spend a lot on this room. And a lot of sleeper sofas sell for $800-$1500. So I began scouring Craigslist.

Finally on one fateful day, I landed upon a sleeper loveseat. It did not include a mattress but I figured I could make it work. After all, it was cheap! We borrowed our friend's truck and had everything set up to go get it then Dave had to stay late at a deacon meeting and it all fell through. I was SO UPSET! 4 days later, we had another open evening so I called to see if it was still for sale and lo and behold, it was! So we borrowed the truck again and drove 45 mins to go pick this up on the other side of town. She was asking $75 but I asked if she'd take $60 and she did.

Once we got it home, I found replacement sleeper sofa mattresses for sale for about $150 online but we were able to tuck our camping sleeping mats inside and they work for now. Then we put another 2" thick foam mattress pad (that we already had) on top of that and it is VERY comfortable. Sure can't feel any bars under your back with 6" of cushion underneath.

So, this is our current guest bedroom. Since we had plenty of extra furniture for our Great Room, I decided to move these end tables into the guest room. Along with a tiffany lamp that Dave gave me years ago when we were dating.
The curtains were leftovers that my mom purchased and did not like but didn't return in time, so I picked them up from her house. I also knew I wanted to buy a few throw pillows but some of them can get expensive.

So one day I was shopping at Garden Ridge and discovered that most of their pillows are only $9.99. So for under $20 I brought home these 2 gorgeous pillows that help to tie together the wall color, green curtains and brown loveseat.

Therefore, the grand total spent on this transformation from disaster of an office to cozy guest bedroom was just $80. Sweet, huh?


This is all that is in this room for now but I like it that way. We use the closet to store DIY supplies and then it leaves the room open for us to do projects in there or for guests to lay out their suitcases when visiting. It's come a long way, hasn't it?


I'm going to link up to the Roomspiration Blog Hop over at DIY by Design today. Check it out for tons of Guest Bedroom ideas!


Related Posts Plugin for WordPress, Blogger...